Search This Blog

Wednesday, September 25, 2013

Autumn Equinox / Mabon Altar

This past Monday, Sept. 23rd, was my 31st birthday and the 22nd was the Autumn Equinox and Mabon.
-For several years now I have periodically enjoyed putting together decorative altars to commemorate this or that season or solstice/equinox or sabbath.    For me it's not only an artistic expression/exercise, but it's also a spiritual one.

I've now been in my first 'own' apt. since this past Jan. and decided to put up an altar in a corner of my livingroom which expresses and celebrates my favorite season, Autumn:


Already beginning to mentally plan my Halloween/Samhain altar...MMmm-hmmm....;D


Steampunk: Costume and makeup

Here's a sneak-peek into my 'still in progress' steampunk costume:

This costume is made up of a mixture of my Renaissance Faire garb and regular, mundane clothing.

And, a 'look' I came up with as a possible choice for my steampunk-themed eye-makeup:


 I will have to come back later and update with the products I used for this look.


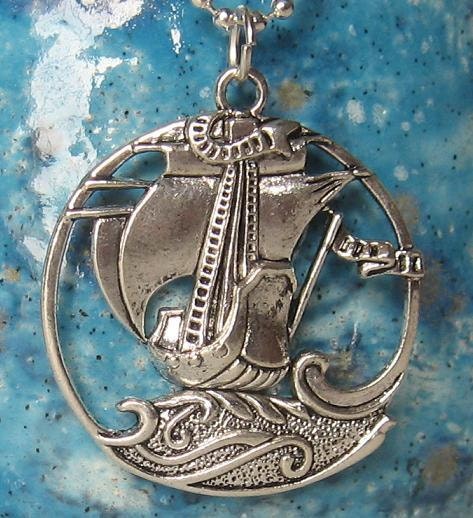
Steampunk: Pirate ship pendant

I'm currently debating on my exact Steampunk costume theme...originally wanted a pirate-steampunk thing...     with that said, I took a pirate ship necklace pendant and repainted and aged it.


I took it from this:

Photo source: Pirate Ship Metal Pendant -Etsy


To this:


I got this pendant for about $5 or $6 at Hobby Lobby.  I painted it matte black (a spray paint), then used my finger to rub on some gold metal-paint to the upraised designs. Then I added in some green patina accents, again with my fingertip, and rubbed it in a little to blend it out.


I'm currently considering turning this into an ornate pendant in combination with some clock wheels and gears and some feathers, to attach to my Steampunk top hat. That or just wear it as a necklace with my outfit...


Steampunk: Flint Lock Pistol WIP -part 2

Aside from some extra copper plumbing bits I may end up attaching to this pistol, the paint-job is totally finished.


As I did with the goggles in my previous entry, I sprayed the painted decorative pieces with matte black spray paint and then used a tissue to dab off the extra on the upraised designs. Using my fingertip I rubbed a small amount of the copper enamel paint onto the upraised parts, much the same as you would with the rub'n'buff paints.
-I wanted it to look aged, but that the upraised designs show through a little more polished in areas where they'd come into contact with skin or fabric, etc. on a regular-ish basis.
-I didn't want to use any rust-like patina on this gun because weapons tend to be well taken care of...knives honed and sharpened via an oiled wet-stone, and guns oiled and polished. Aging is one thing, guns get dirty. But anything that hints at rust shows neglect and a severe lack of care.     Depending on the character you are portraying, rust might be called for, but for my character...not the case.

Some detail pics of the aging effect:


Steampunk: goggles WIP -part 2

New update:
I think that, as of tonight, I've got the painting part of the goggles finished...they've now been aged and polished in places and even added on some green patina.


*In 'aging' these, I was trying to keep in mind how aged brass looks...where it darkens, where it remains polished at points where it is continually being touched or rubbed, and where it's most likely that any kind of a rust-like patina might show up.

The patina shows up more 'pronounced' with the flash from the camera. In person it's a bit more subtle of an effect.
-To age/darken I sprayed on the matte black spray paint and then taking a tissue I just dabbed the excess off and left the black in negative areas.  I took the gold metal paint on my fingertip -just a very little bit, and applied it to the upraised areas with my fingertip, much the same as you would with the rub'n'buff paints.

Here's the patina and enamel/metal paints I used:


So detail photos:


I've now got all of my additional clip-on lenses here, though I think I need to pick up a replacement lens for the goggles themself. I want to paint that lens a deep blue shade using alcohol paint or some kind of reflective metallic paint.

(Edit) *the additional lens I used on these goggles were ordered from suppliers through Amazon.com
-SE Lens Clip  -both single and double lens
-5x Spectacle Eyeglass Magnifier

I will also be attaching leather straps and some leather for the middle nose-piece before it's all done with.

So far I'm really liking how well they are coming along. I'm quite impressed with how well they are turning out, especially with this being my first project of any sort like this.