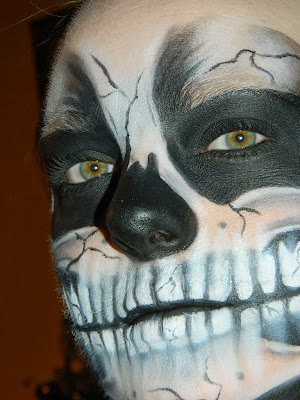
And this last post wraps up the skull makeups I did over Halloween weekend. These next two are the 4th and 5th applications.
Nov. 1st -All Saint's Day, Full Skull Makeup.
-Starting out with a few of the progress photos:


These next are without my camera's flash:


And here's where I started to take off the makeup:


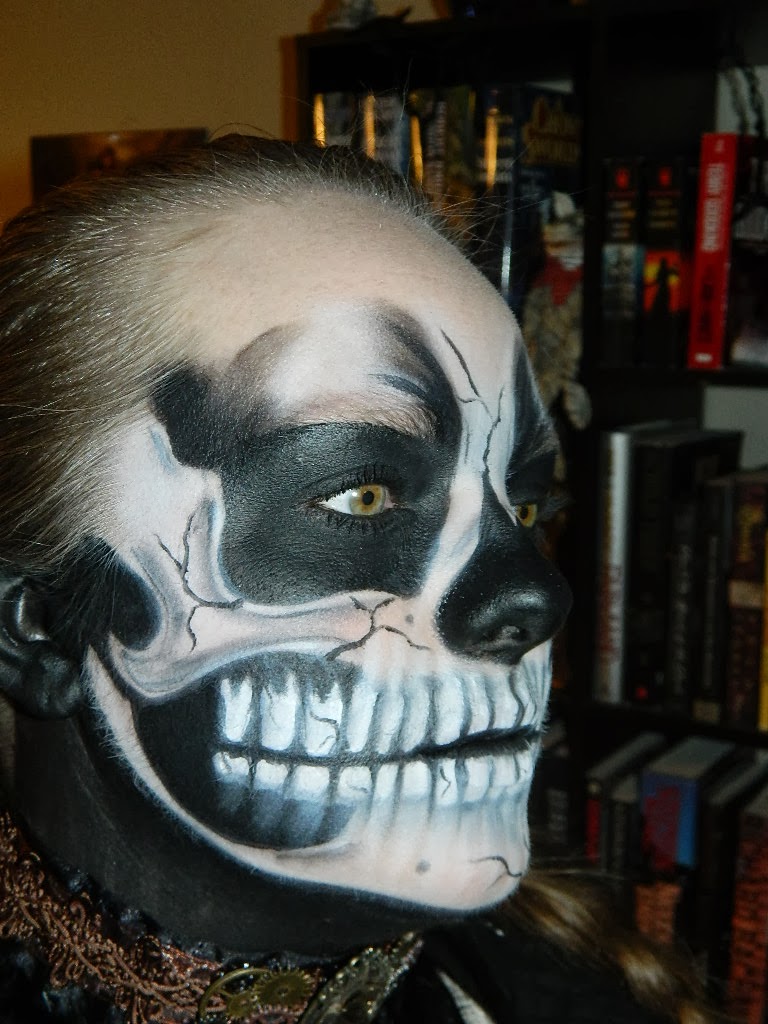
And lastly, the 5th and final application from Nov. 2nd, 2013:
With each application, of course, some things are bound to be a little different in one way or another...this time, I decided to add fine, hair-line cracks to the teeth...a detail I quite like:


I have a tutorial, or progress, video I'll be working on soon....so once that is finished, I'll post that and then no more skull makeup for a while.:)
Hope you've all enjoyed all of these skull makeup pics, though.:D
Nov. 1st -All Saint's Day, Full Skull Makeup.
-Starting out with a few of the progress photos:
 |
| This was my set-up at my computer desk where I applied my makeup. |
 | ||
| The products I used from Mehron's Paradise water-activated face makeup to NYX and MAC's matte eyeshadows. |


These next are without my camera's flash:


And here's where I started to take off the makeup:


And lastly, the 5th and final application from Nov. 2nd, 2013:
With each application, of course, some things are bound to be a little different in one way or another...this time, I decided to add fine, hair-line cracks to the teeth...a detail I quite like:


I have a tutorial, or progress, video I'll be working on soon....so once that is finished, I'll post that and then no more skull makeup for a while.:)
Hope you've all enjoyed all of these skull makeup pics, though.:D


