This Friday night I am attending a large Masquerade event that will include live bands and Burlesque dancers and a costume contest...which I aim to win! ;D
Halloween Masquerade Ball in Casper, WY

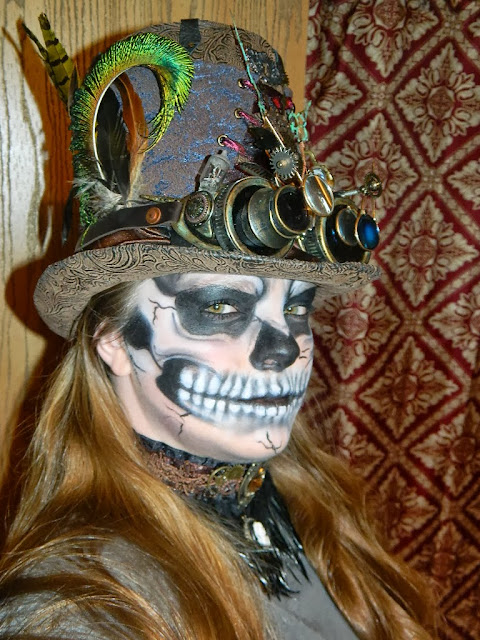
So, with Halloween right around the corner, I felt like regular Steampunk just isn't going to cut it and decided to amp the whole costume up with a Skeleton makeup. So here are some pics of me working on the makeup in various stages and then finished. And, of course, tonight just being practice -it's not perfect and no doubt will be subject to change each time I do it.

I used a couple different skeleton makeups found online as reference a couple of my own touches here and there.
 -After applying my regular liquid foundation and letting that dry, I then used a black pencil liner and sketched out my designs.

 -Here I used cheap Halloween cream makeup in a tube that I purchased for .98 from Walmart and filled in my design with the black paint using a paint brush. To set and mattify the black cream makeup, I went back over the filled in areas with some matte black eyeshadow and an eyeshadow brush.


 -First using white Halloween cream face paint and then setting that with matte white eyeshadow, I started filling in the teeth and going back in with black eyeshadow to fill in the shadows between the teeth.
-I also used the white eyeshadow to create highlights along the bone-ridges and so on.
-The hair-line fracture cracks were created using black gel liner and an eye-liner brush.


And now....with some of my Steampunk accessories -all made by me.:)


Halloween Masquerade Ball in Casper, WY
So, with Halloween right around the corner, I felt like regular Steampunk just isn't going to cut it and decided to amp the whole costume up with a Skeleton makeup. So here are some pics of me working on the makeup in various stages and then finished. And, of course, tonight just being practice -it's not perfect and no doubt will be subject to change each time I do it.

I used a couple different skeleton makeups found online as reference a couple of my own touches here and there.


-I also used the white eyeshadow to create highlights along the bone-ridges and so on.
-The hair-line fracture cracks were created using black gel liner and an eye-liner brush.


And now....with some of my Steampunk accessories -all made by me.:)